DailyDiscovery
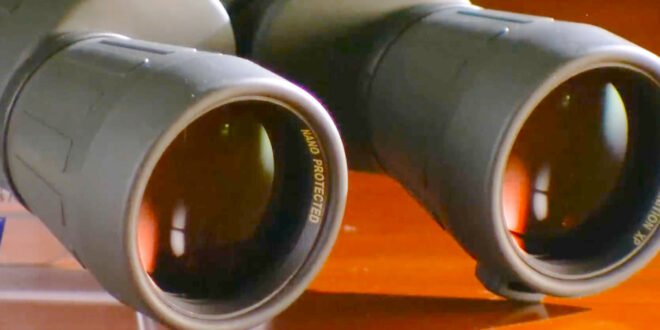
Binoculars
In essence, a pair of binoculars is a portable double telescope. The objectives, which are the lenses at the far end, let light beams from the object you’re looking at enter. This projects a picture within the binoculars’ housing, directly behind those lenses.
That image is then magnified by the smaller eyepiece lenses that you look through. The image appears upside down because of the curved objectives. A glass prism is required for each binocular half in order to turn it upside down.
Workers place many prisms on steel plates using UV-light-activated glue, then proceed to grind and polish them. Protective paint shields the immaculate surface from contamination. Diamond dust can remove just tenths of a millimeter of glass grinding.
One hundredth of a millimeter is removed by polishing with an even finer abrasive. Upon completion, all three sides are precisely level. This reduces reflection, which is essential to the glasses see-through quality.
They adhere two glass pieces at a 90-degree angle to create each prism. A UV light burst dries the adhesive.
The inverted image is rotated ninety degrees by the first piece of glass. The flip is finished when the second rotates it an additional ninety degrees. Let’s move on to the goals.
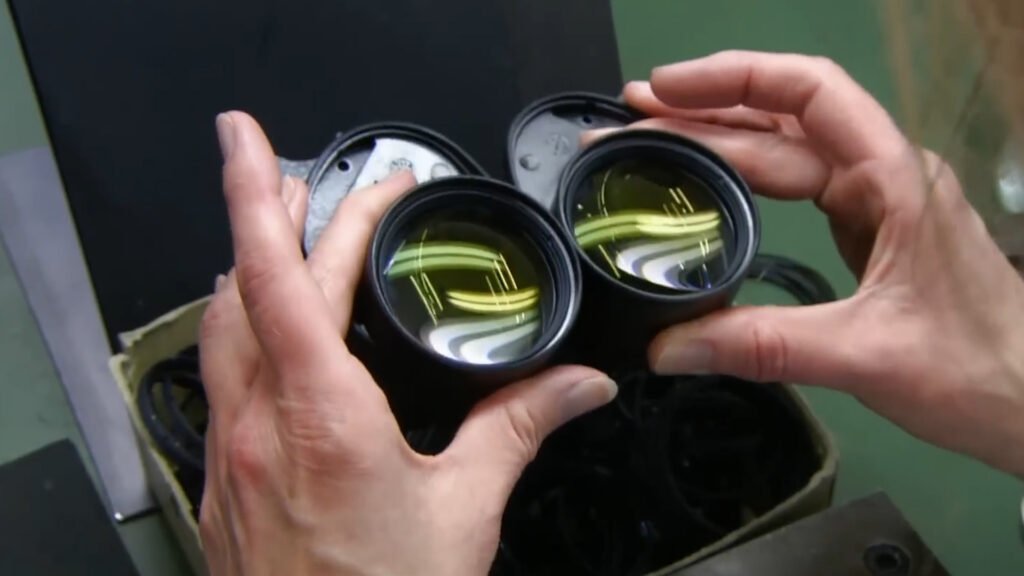
The same processes of grinding and polishing as the prisms have been used to these curved lenses. They now go through a computer-guided, nine-step cleaning procedure. A technician examines the lenses and then fuses two of them together.
It’s imperative that they completely complement each other. The image quality will be low if the alignment is incorrect by more than a hundredth of a millimeter.
It is just necessary to match the dots displayed by this alignment machine, which represents each lens’s center as a dot. The adhesive dries after two seconds of UV light exposure. After that, a technician fills a vacuum chamber with mineral pellets.
The corporation keeps their precise recipe a secret. More light can enter the lenses thanks to the anti-reflection coating the pellets create. An electron beam evaporates into minute particles that coat the lenses inside the vacuum chamber the pellets.
It’s time to start putting the binoculars together. The goals start with the housing, which is often composed of carbon, aluminum, or plastic. After giving the lenses several blasts of compressed nitrogen to clean them, the workers use threaded retaining rings to keep the lenses in place.
After applying a few drops of adhesive behind the objectives—where the prisms would be placed—and another nitrogen burst to clear any remaining dust, the prisms are inserted. This optical device aligns the prism’s and its matching objective’s focal points.
Additional glue is then applied to secure the alignment, and the glue is dried with a burst of UV light. The objectives and prisms are now siliconed to the middle area of the housing.
When workers screw in the parts, this holding mechanism forces the parts together. The oculars, or tiny lenses that you look through, are located at the other end of the center part.
They also fasten using retaining rings that are threaded. Now, a machine draws air out of the housing and injects nitrogen gas through a valve on each side. Nitrogen keeps things from foggy.
To make sure there isn’t a leak, they check the nitrogen pressure again a day after filling. This firm rigorously tests every pair of binoculars it makes, putting them through lengthy vibrations, water pressure, intense heat, cold temperatures, and other challenging situations. Inspectors verify that all components continue to function flawlessly both optically and mechanically, after each test. View more posts

Telescopes
Four centuries ago, a Dutch optician invented the telescope. The earth was thought to be the center of the universe prior to that. It was discounted to think that it truly swung around the sun.
The telescope sharpened reality in the hands of the Italian astronomer Galileo. Through the eyepieces of contemporary telescopes, which are light years ahead of their predecessors, the cosmos is still being revealed. Using mirrors, a reflecting telescope concentrates and bounces light.
Metal parts that are cylindrical are machined to start the production process. When screwed together, these baffles will filter stray light that could interfere with the telescope’s ability to function. An aluminum disk that is solid becomes a spoked ring with additional tools.
This component, known as the spider, serves as a support structure for the secondary mirror of the telescope. They submerge the metal components in a vat of black dye after applying a protective oxide coating. The color fills in the rusted pores on the pieces, sealing their surface.
This molded disc of low-expansion, thick glass will then serve as the main mirror for the telescope. A tool with a diamond edge spins at a precise angle to slightly concave on the glass. An employee applies an abrasive coating to the glass to enhance the concave contour.
He spins a finely curved cast iron disk after adding a weight to it. To precisely adjust the glass’s curvature, the weighted iron disc presses down on the abrasive-coated surface. After checking the finely honed surface for scratches, a worker measures the radius of the disc using a calibrated gauge to ensure that the concave profile is exactly what is required.
Now, a cylindrical cutter, points dead center to create a hole while the glass rotates. This center hole will allow the mirror to be kept firmly in the telescope and is sized to accept the baffles we previously observed. The glass disc is then polished by an automated tool rubbing a compound against it while it oscillates.
Next, a worker uses a polishing disk and some compound, repeatedly rubbing the glass’s surface against it. To ensure the proportions are correct, a technician in the lab compares the main mirror glass to a grid.
He points the laser at the window. A computer examines the light that is reflected. The image through the telescope may appear fuzzy if the angle is wrong by a thousandth of the width of a hair.
They can now achieve a mirror sheen by polishing the glass. Inside a vacuum chamber, they lock it face down. Tiny amounts of silicon monoxide, aluminum, and titanium oxide are added.After sealing the chamber snugly to keep the contents within, they pump out most of the air, leaving a partial vacuum. This causes an ion discharge to glow and spin onto the glass disk.
These ions thoroughly clean the glass by blasting away any remaining impurities. The pellets of silicon, titanium, and aluminum heat up and turn into a cloud of vapor. Atoms condense and settle on the glass’s surface to create a gleaming mirror finish.
This highly reflective coating may be applied in a matter of minutes. Now that the telescope mirror is prepared, it can reflect back the light from the stars and planets in the sky. Next, a technician screws lenses into the metal housing for the primary mirror.
He adds an eyepiece mount mechanism, complete with focus controls. He turns the unit over and fits the well machined mirror into the housing. To prevent scratches when installing a retaining ring, a cork ring is used to cushion the mirror.
The primary mirror of the telescope is now fastened to the housing. After assembling the three-part baffle, he screws it to the lens holder so that it protrudes from the telescope mirror’s center. He connects the telescope tube to the baffle and mirror assembly.
A secondary mirror built into the tube will reflect pictures reflected from the first mirror back for viewing and magnification. This telescope took roughly six weeks to build and is now prepared to aid in the discovery of the universe’s mysteries. View more posts
Space Pens
It can also write when submerged in water, exposed to high temperatures, or held upside down. The pen’s clever design, which ensures that ink always flows toward the tip, makes all of this possible. The space pen’s clever design pressurizes its ink with nitrogen, enabling it to write when submerged in water, exposed to high temperatures, or held upside down.
The creators of the pen developed it in 1966 and initially used it in space by the astronauts on Apollo 7. Initially, the writing point of the pen is a block of stainless steel measuring three tenths of an inch in length.This establishes a ballpoint. The last station locks the ball in place while allowing it to rotate and disperse ink by inserting the ball and bending the pocket’s edges inward. The refill, often known as the interchangeable ink cartridge, starts out as an empty metal tube.
This assembly machine pumps in half a gram of ink after inserting a white plastic ball into the back end. We refer to the white ball as the float. Its task is to move any leftover ink forward and toward the tip by following the ink down the tube.
The writing tip is then inserted into the other end of the tube by the machine, which subsequently crimps the end to make sure the writing point cannot come loose.
This illustration demonstrates how pressured nitrogen forces the ink to flow. A printer prints the brand name and product details on each refill after putting them through a writing test and cleaning the surface to get rid of any residues from machine oil and other materials. Some Space Pen versions come with a cap that covers the writing tip.The clip is made of spring steel, a metal that is reasonably flexible. For beauty and resistance to corrosion, it is chrome-plated.
The clip is locked in place when the machine twists the teeth back toward the inside of the wall after driving them through the cap’s wall. A feeder deposits the bottom component, referred to as the barrel, into each spoke of the barrel assembly machine in order to build the two-part brass body of the pen. The machine inserts a brass reinforcement piece known as the nose tip in order to straighten the writing end.
The nose tip then flares inside the barrel as it crimps the end, making it broader than the barrel opening and impeding its ability to slip out. The clipless cap and brass body of this type are coated in chrome.
Finally, the assembly is complete. After filling the barrel with refills, they fit the connector into the upper portion of the body and use an electric motor to thread the components together.
They insert the pen after setting the cap, open side up, in a foam holder. There is a push button on top to push out the refill and another on the side to retract it on the original Space Pen, which is still in production.
We have taken away a portion of this demonstration pen to reveal the internal mechanisms. Every Space Pen model has zero gravity and underwater writing capabilities. They also function in extreme heat, absolute cold, and reverse orientation. View more posts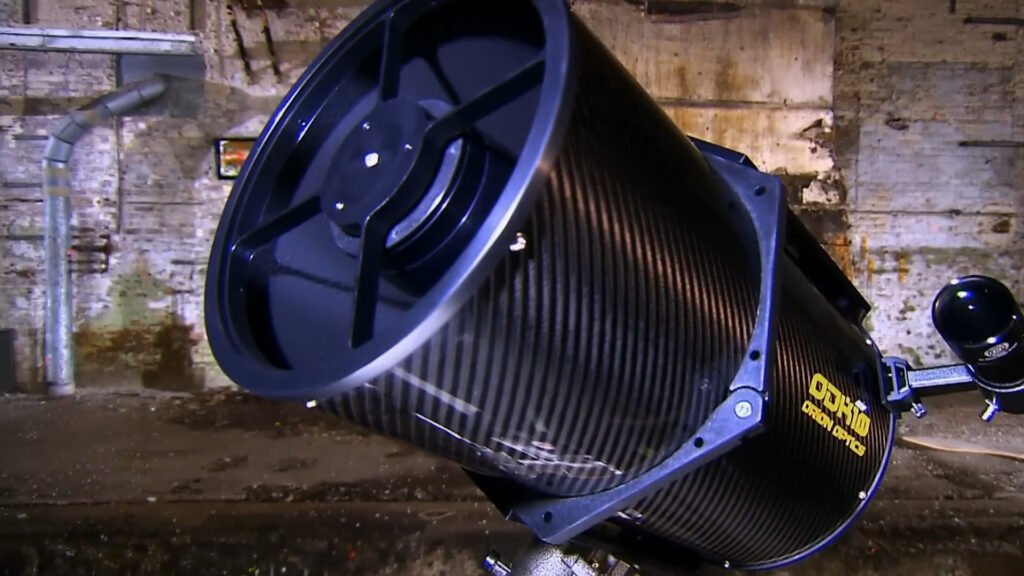
Aerospace Fasteners
Building the fasteners holding the components of an airplane together to exact technical specifications from high-strength, corrosion-resistant materials is essential since an aircraft must be able to survive harsh circumstances and stress. The stainless steel used in these bolts and screws is of aeronautical quality.
The steel factory sends it to us in coil form. The company lubricates some fasteners with copper coating, which serves as a lubricant, and adds further lubrication using chemicals and powdered soap.
This bolt-forming machine receives wire from the drawing machine. It starts by heating the wire and cutting what are known as blanks. The next step involves putting each blank through five distinct dies, each of which gradually molds it into a bolt.
This T-bolt doesn’t require additional copper lubrication because it is constructed from a different kind of premium stainless steel. The coil undergoes the same procedure as the bolt that was smaller and that we just witnessed. To shape the T-bolt, this bolt-forming machine, however, is much larger and employs four dies as opposed to five.
Through multiple quality control inspections during the manufacturing process, all fasteners must pass. In this test, the factory measures the bolt’s head length and diameter and compares the results to the technical specifications. The fasteners must spin in a deburring machine because they have burrs on their sharp edges when they come out of the forming machinery.
This one has a very straightforward design yet a powerful presence. A third party receives some types of stainless steel fasteners to be heat treated, strengthening them. To dissolve the copper without corroding the steel, the third party immerses fasteners made of copper-lubricated stainless steel in a nitric acid bath for around 20 minutes.
After giving the fasteners a thorough water cleaning, workers spin them quickly to dry them off. Forming threads on the fastener’s body is the last stage.
That’s because thread rolling is the method this factory uses to accomplish that. This thread rolling machine rolls one bolt at a time between two dies to generate the thread pattern, as opposed to using machining equipment to cut threads into the shank, which loses steel and may weaken the bolt.
In fact, compressing the steel to create threads strengthens it and improves its capacity to withstand stress during flight without removing any material.
A specialist measures them with an accurate gauge. He then employs ring gauges.
The dimensions are incorrect if the fastener screws into the no-go gauge. They are right if it screws into the gauge.
Every fastener in the system can be traced back to the batch of steel that was used to make it. Tensile strength is another test used in quality control that determines how much draw force a fastener can sustain before breaking.
In a further test, specialists disassemble the fasteners, polish them, and put them on a puck that resembles a cake. They then look at the parts under a digital microscope. View more posts
They examine the steel’s grain structure and size, among other features. Because of its high nickel and chromium content, this variety of stainless steel is resistant to corrosion and extremely high temperatures. An additional test evaluates the steel’s hardness using the internationally recognized Rockwell hardness scale.
Since these fasteners are what keep airplanes together, rigorous testing like this is essential for safety.